
Tinapay (bread in Filipino) is as much a staple as rice to us Filipinos. We have it in the morning, a snack before lunchtime, in the afternoon merienda (snack time) or just anytime we feel like it, especially with a cup of coffee. The neighborhood panaderya (bakery) is always brimming with a cornucopia of bread varieties that’s always a feast to the eyes, like the ever so popular Pandesal and Spanish Bread.
Ensaymada on the other hand, though it’s still a part of the usual bread sold at bread shops, is at a different level. It’s a league of its own. Everyone has their own favorite ensaymada, from the humble ones sold at local corner shops to the artisanal versions that create ensaymadas fit for those with very sophisticated palates. We all have different preferences and this is mine. I love it so much that I have to put the recipe on the back burner otherwise, I would be making these all…the…time. It won’t do me any good as these buttery rich buns are so addicting that my poor self control walks out the door when these are in front of me. Don’t say I didn’t warn you.
This recipe was heavily adapted from a Maya Kitchen baking book which I’ve had since the early 2000s. The only things I tweaked were the liquid amounts and some bits in the process. I also added a simple buttercream to top it with to better keep the grated cheese in place. It’s a very rich dough and is not in any way diet food. But if you’re looking for a really delicious and satisfying ensaymada recipe, look no further.
Take your time in mixing the dough until the windowpane stage, when the dough can be stretched enough thinly (almost translucent) without ripping. Then, let it proof, shape and bake.
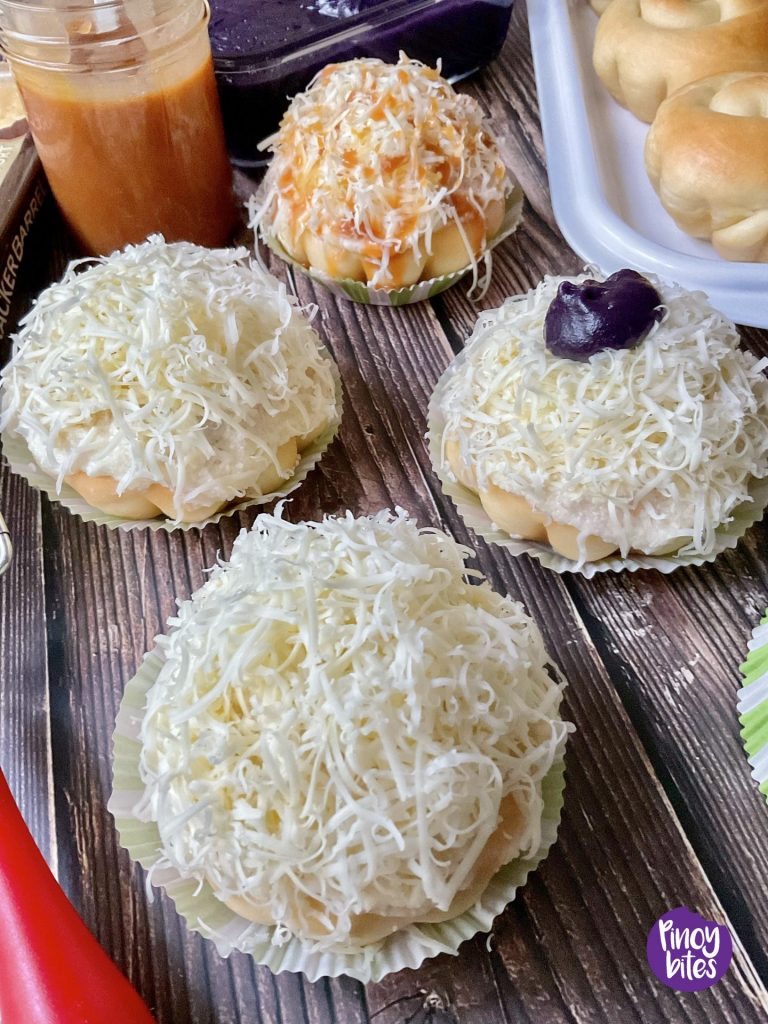
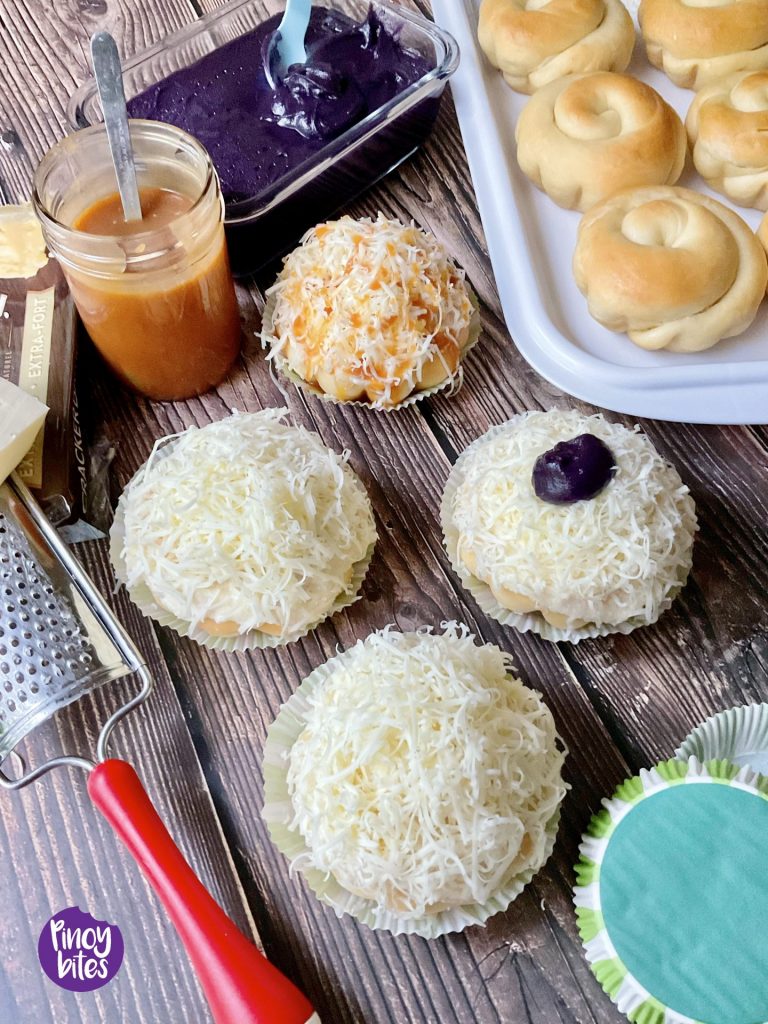
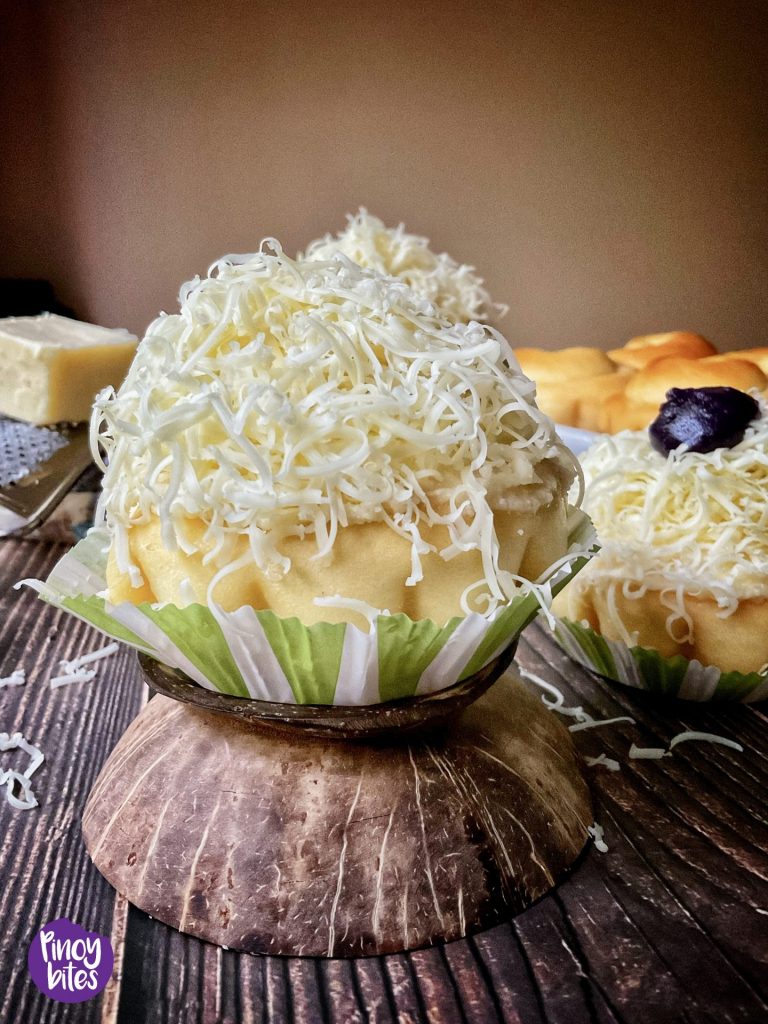
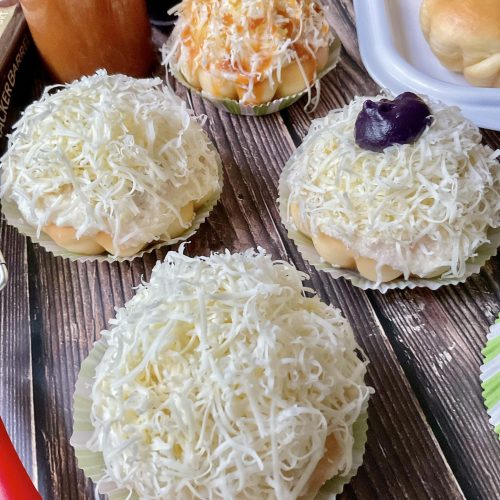
I like my ensaymada with a heavy slather of buttercream then generously topped with a good extra old cheddar cheese. With a cup of black coffee on the other hand, it’s pure bliss!
Shaping the Dough:
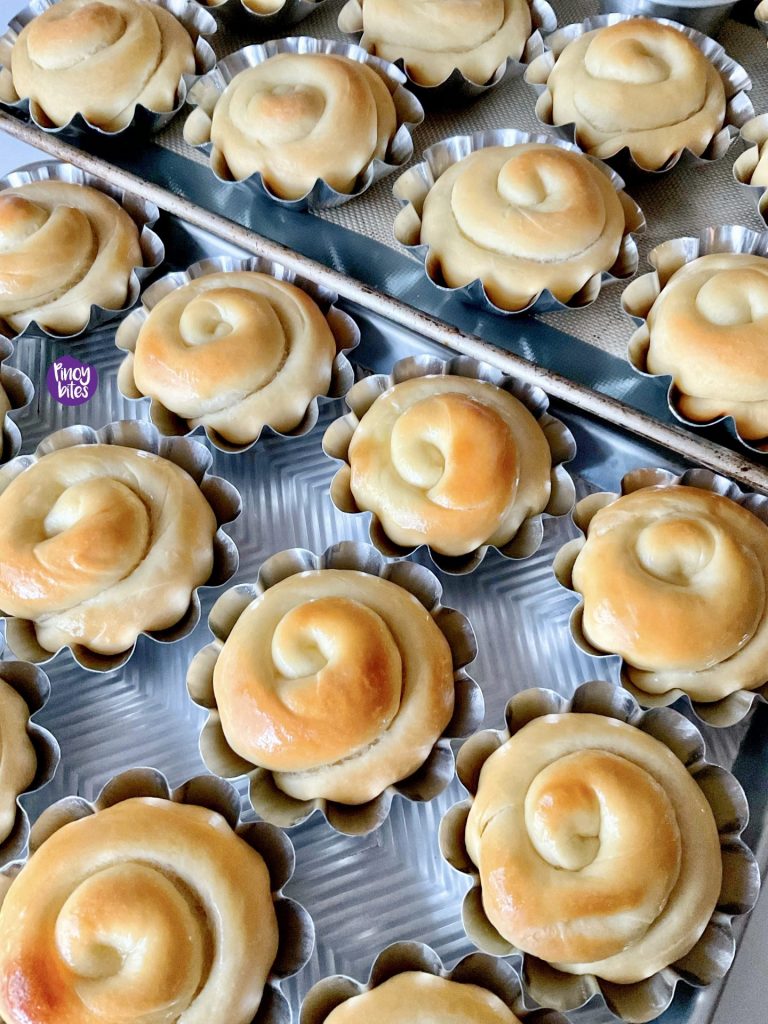
There are different ways to do this – from simple (which I prefer) to the more complicated way, particularly when a filling is added. Divide the dough into 24 equal pieces, each weighing about 75 grams.
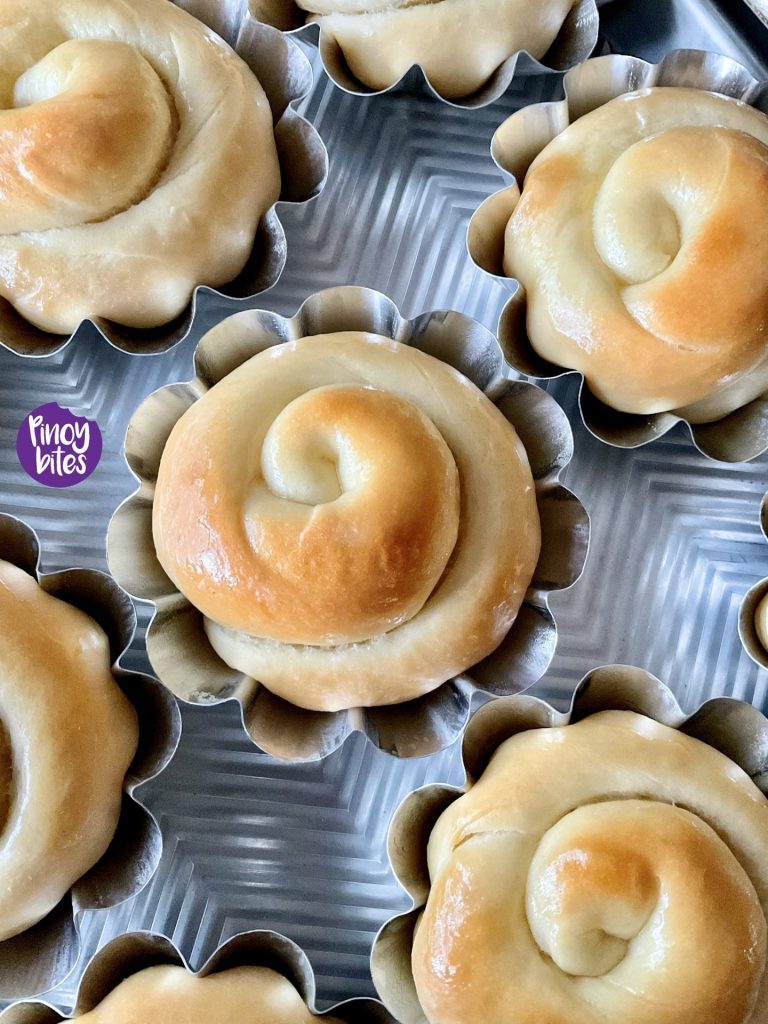
- Flatten each with a rolling pin into an elongated oval then brush softened butter in the middle third of the dough before rolling into a cylinder, tucking the seams if needed. Using 2 hands, roll the dough into a long log until you reach about 12-15 inches. Coil the dough around 2 fingers then tuck the end underneath before placing into a greased mold.
- The second way is to just simply roll each dough into a log and coil (without flattening).
- And the other even easier way is to just form each one into a ball and place in the middle of the greased mold.
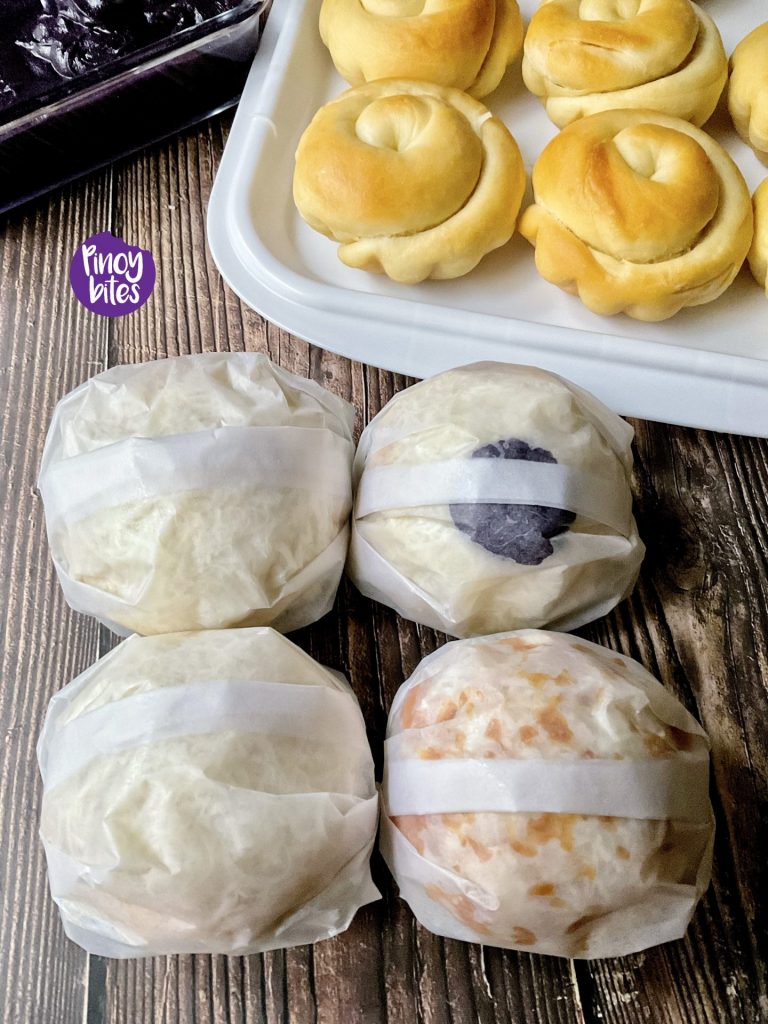
Whichever way you shape it, the difference is unnoticeable except if you want it filled with Ube Halaya, Caramel or other fillings that you want. If you cannot find or don’t have Ensaymada mold, that’s totally fine. Shape as to your preference above then arrange on a silicone-lined (or parchment) baking sheet, leaving a few inches in between.
Homemade Ensaymada (Rich and Buttery)
Equipment
- Ensaymada molds, 4 ¼ inch diameter (optional)
- Greaseproof jumbo cupcake liner, if not using mold OR 3 muffin pans (well greased)
- 2 half sheet (12×18 inches) baking pans if not using mold
Ingredients
For the Dough
- ½ cup warm water 105F – 110F
- 1 tablespoon sugar
- 1 ½ tablespoons active dry yeast
- 1 cup warm milk
- 8 egg yolks from large eggs
- 1 cup sugar
- 1 teaspoon sea salt
- 1 cup melted butter divided (set aside ⅓ cup for brushing)
- 6 to 7 cups all-purpose flour
- Extra melted butter for brushing the molds
For the Buttercream:
- ½ cup butter
- 1 to 2 tablespoons icing sugar (powdered sugar) OR just brush with softened butter and dip in sugar
Instructions
- In the bowl of a stand mixer (I used a 6qt Kitchenaid), combine the warm water, sugar and yeast. Mix and let proof for about 5 minutes.
- Add in the milk, egg yolks, sugar, salt, ⅔ cup melted butter and 3 cups of flour. Mix with the paddle attachment for 10 to 15 seconds or until well combined.
- Switch to the dough hook and add another 3 cups of flour. Once the flour is mixed in and the dough is still very sticky, add ¼ cup more and another ¼ cup (½ cup total). Add more flour, 1 tablespoon at a time just until the dough barely clings to the bottom of the bowl. Continue mixing using speed #2 until you reach the windowpane stage (when a piece of dough is thinly stretched without tearing indicating that the dough is properly kneaded).
- Form into a ball, cover with plastic wrap and let rise at a warm spot for 1 hour. Dough will be or almost be doubled. Punch the dough to release excess air and divide into 24 pieces.
- Shape the dough (pls refer to Shaping The Dough in the article above the list of ingredients). Cover and let rise for 30 minutes. Divide the dough into 30 pieces if using muffin pans.
- Preheat the oven to 325F. Lightly brush with melted butter then bake for 17 to 20 minutes or until light golden.
- Cool completely before brushing/spreading with butter/buttercream then generously top with freshly grated cheese. Or just simply a sprinkling of sugar, if preferred.